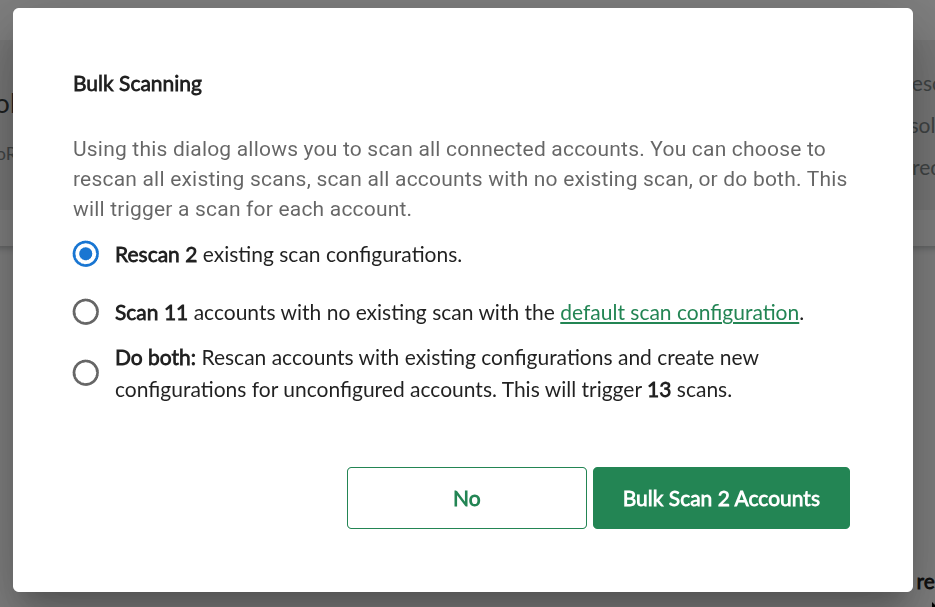
🔍 Bulk Scanning
The Bulk Scanning feature allows you to scan multiple connected accounts at once—saving time and effort compared to scanning them individually.
📍 Where to Find It
You can access Bulk Scanning from the Home view:
- Go to the Home view.
- Click the More Actions button (⋯).
- Select Bulk Scanning from the dropdown menu.

✅ What You Can Do
1. Rescan Accounts with Existing Settings
- Rescans only the accounts that already have scan configurations.
- Example: If 2 accounts have existing scan setups, only those will be rescanned.
2. Scan New Accounts
- Scans accounts that have never been scanned before.
- Uses the default scan configuration automatically.
- Example: If 11 accounts are unscanned, this option will scan all 11 with the default configuration.
3. Do Both
- Rescans accounts with existing scan setups and scans new accounts.
- Example: If 2 accounts are already configured and 11 are not, this option will scan all 13.
🟩 Action Buttons
- No – Cancels and closes the dialog without running any scans.
- Bulk Scan [#] Accounts – Runs scans based on the selected option. The button shows you how many scans will be used from your quota.
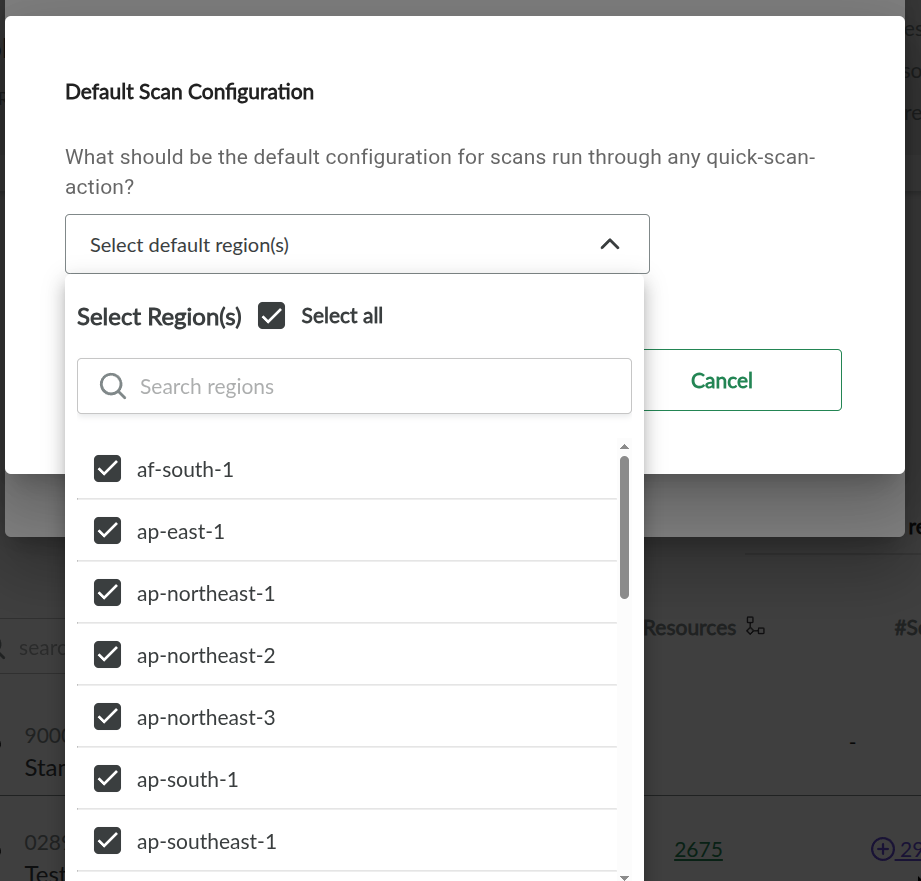
⚙️ Default Scan Configuration
This dialog allows you to set a default scan configuration that will be used when running quick-scan actions—such as through the Bulk Scanning feature.
To configure scans for specific accounts individually, use the Manage Scans button for the target account and follow the Quickstart Guide.
By default, the scan is configured to cover the entire account, including all accessible AWS regions. This is typically the best option and doesn’t require changes for most users.
If needed, you can limit the scan to specific regions to speed up the process and reduce resource usage. Regardless of your selection, the global AWS region will always be included in the scan.